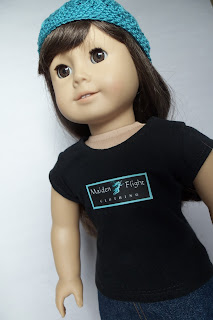
 This is a good beginning project for a young girl who loves her American Girl doll and would love to have some new clothes for her little friend. This easy project will encourage her because she will quickly see a completed project for her favorite doll. The project is entirely machine stitched and has NO curved seams. It will allow practice in making a casing for elastic.
Supplies you will need for this project:
tissue paper or a piece of newsprint to use to make a pattern
a fat quarter of fabric
11" piece of 1/2" elastic
scissors or rotary cutter
bodkin or safety pin
thread
ruler
iron
sewing machine
sewing pins
PREPARATION:
Before starting the project, cut a 16" x 7 1/2" rectangle from a piece of tissue paper or newsprint. Measure 6" from the short end and draw a straight line and place arrows at the ends. This will be used to measure the straight of the material.
OR
If you are old enough to safely handle a rotary cutter, have her cut a 16" x 7 1/2" rectangle from the fat quarter. If you use the rotary cutter, skip to Step 4.
STEP 1
Lay the pattern on the straight of the fabric measuring from the selvage.
 STEP 2
Pin in place.
 STEP 3
Cut out the pattern.
STEP 4
Machine stitch 1/4" along both long edges.
 STEP 5
Fold over fabric along stitching line and press with iron.
STEP 6
Along one long side, fold over 1/4" again and press.
 STEP 7
Edge stitch the double folded edge. (This will be the hem of the skirt).
 STEP 8
On long side opposite the hem, measure 1 1/2" from the folded edge and mark with tailor's chalk.
 STEP 9
Fold over fabric to align edge of fold and chalk line; then pin in place.
 STEP 10
Press fold.
 STEP 11
Edge stitch to form the casing for the elastic waist.
A VERY helpful item to enable you to sew straight lines of stitching is the little item in the above picture. Some sewing machines come with this item. If yours didn't, a strong straight magnet will also work as a sewing guide.
 STEP 12
Attach a bodkin or safety pin to one end of the elastic and thread the elastic through the casing.
 STEP 13
At both ends of the casing, machine stitch the elastic to keep it secure.
 STEP 14
The final step is to fold the skirt in half (right sides together) matching short ends and machine stitch 1/4" from the edge.
Turn right side out.
That completes the project.
 Here my daughter, Orangeblossom, smiles proudly as she displays Molly in the finished skirt.
 If you would like a longer skirt, just increase the width of the skirt.
It can be individualized by embellishing it in any way your creativity leads you.
I hope your little girl will enjoy this sewing project.
NOTE: The 11" length of elastic is just right for an American Girl doll waist, but may have to be adjusted for other 18" dolls such as Gotz, Springfield, etc.


